Ledge doors
In this photo series, we will look at the production of ledge doors exactly according to existing doors, which, however, cannot be restored or renovated due to their severe damage.
Original ledge doors
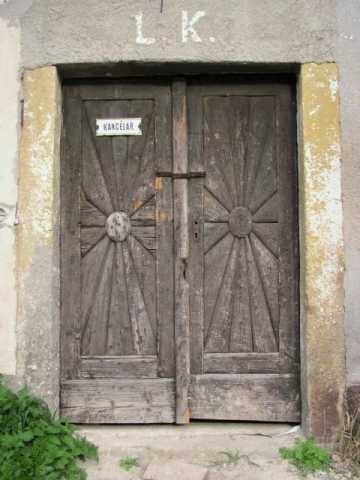
This is a door made of spruce board, decorated almost over the entire surface with a rosette with an oval center.This is a door made of spruce board, decorated almost over the entire surface with a rosette with an oval center.

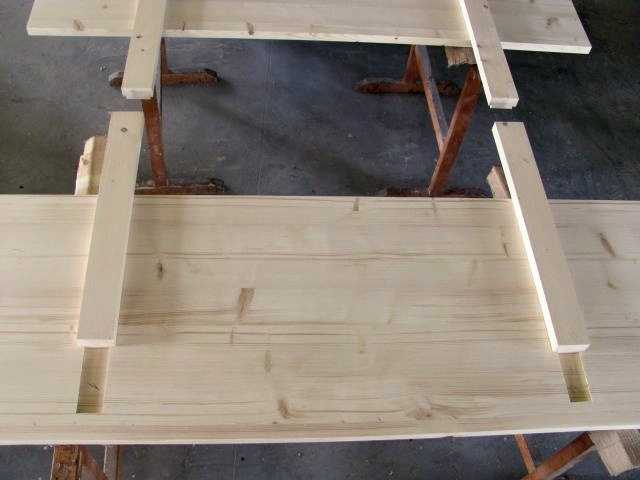
Preparation of material for grouting

Rough profile of planed skin without decoration
The base support plate is made of spruce joint. The places where the grooves of the tendons will be located were carefully outlined on the joint. The strips act as a reinforcement of the board, preventing it from twisting or buckling. As the strips are dry-set in place without gluing, they allow the jointer to work during changes in temperature and, above all, humidity.

Fitting the skin into the groove
Fit test
Due to the conical shape and the individual fitting of individual tendons, it is necessary to describe everything well in order to avoid confusion.
Then came the decorative element of the visible side of the tendons. This decorative element forms a more powerful profile on the longitudinal edges of the tendons. Now the slats can be bumped and shortened with the edge of the door leaf, just as it was in the original design.

Planed decorative profile

Impacted shortened tendon
Next, mostly manual work begins on the frontal rosette. The front surface of the door will be decorated with a bordered rosette and, in addition, one massive piece will be placed on the side of the threshold.

Gliding of the massive lower part
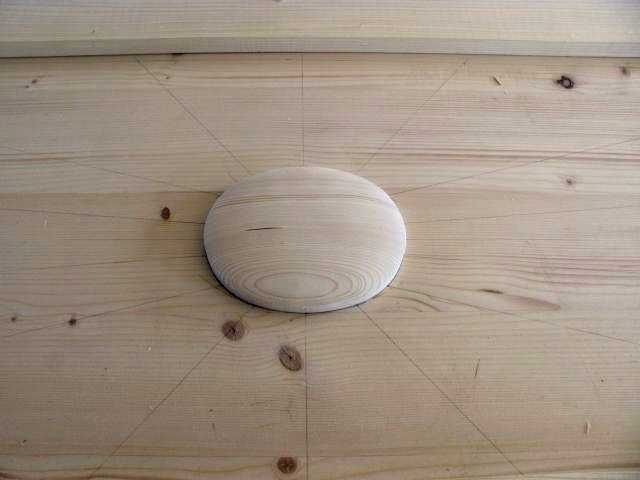
Oval rosette center
In order for the space for the rosette to be precisely defined, boundary boards were first attached to the joint. An oval center was placed on a symmetrically outlined surface and its perimeter was gradually formed.
The peripheral rounded parts of the rosette are machined with a hand planer. The same parts are used on both wings to maintain the symmetry of the rosette pattern.

Drawing and cutting parts

Manual edge planing

Production of discharge parts

Symmetric fit
This is followed by the final fixing of the perimeter boards of the rosette, folding, forging hinges, fitting the lock and its counter-plate, fitting flaps, cleaning the joints, and the door is ready for surface treatment and assembly.

Fitting of the counter plate of the lock
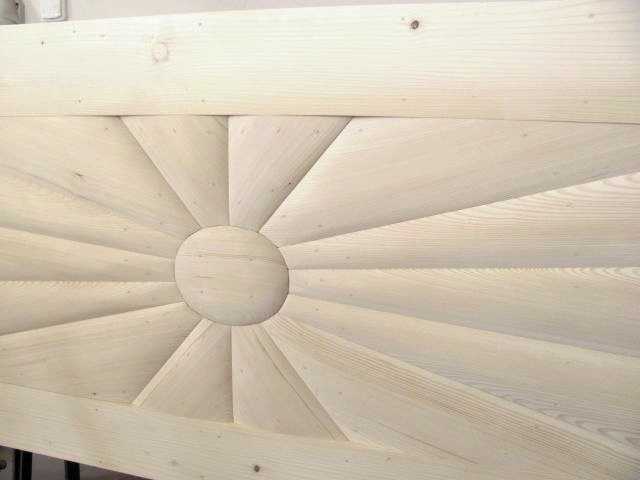
Detail of the final rosette
Original door as a template

Finished copy of the ledge door